
The purpose of this article is to guide users in creating and releasing activities and how to use the activity editor.
How to Create an Activity?
-
Click the “Create a new Activity” button.
-1.png?width=688&height=324&name=Untitled%20design%20(43)-1.png)
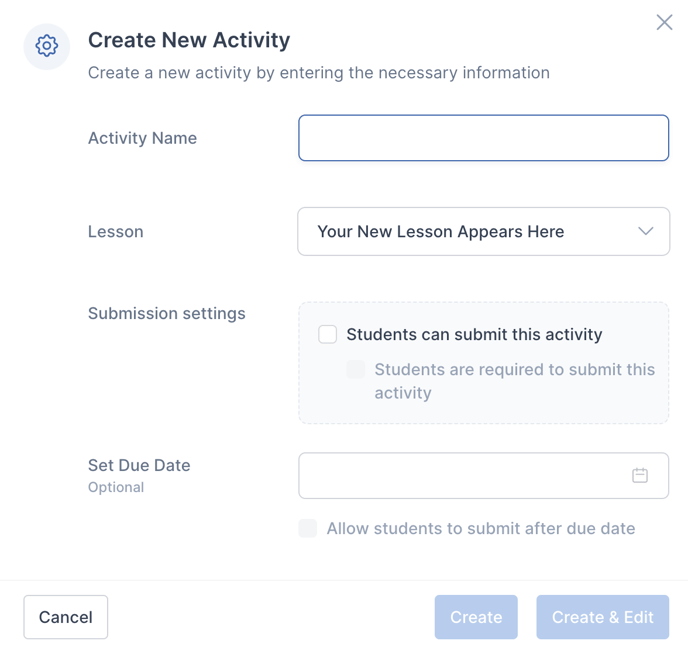
- The "Create New Activity" modal is displayed.
-
Fill in the fields.
-
Click Create to create your activity.
-
Click Create & Edit to open your activity in the Activity Editor.
How to Edit Activity?
-
Сlick on the three dots on the right side of the page > Click “Edit”.
-
Or click to select an Activity from the activity list page.
.png?width=688&height=344&name=Untitled%20design%20(60).png)
-
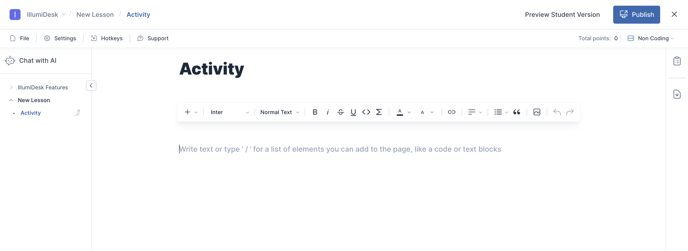
The activity editor page is opened.
How to Delete Activity?
-
Сlick on the three dots on the right side of the page.
-
Click the “Delete” button.
.png?width=688&height=344&name=Untitled%20design%20(68).png)
How to Duplicate Activity?
Activity duplicating on the activities list page
- Сlick on the three dots menu for selected activity (both published or not published).
- Click on “Duplicate” option.
-1.png?width=688&height=225&name=Untitled%20design%20(24)-1.png)
- Activity is duplicated to the current lesson with "draft" status.
- Toast message "Activity duplicated successfully to <lesson_title>. Review Activity" is displayed.
- To open just duplicated activity user can click on the "Review Activity" link in toast message.
How to Duplicate Activity in Activity Editor
- Open the Activity you want to duplicate to open the Activity Editor.
- Click on "File" in the header options at the top left of the Activity Editor page.
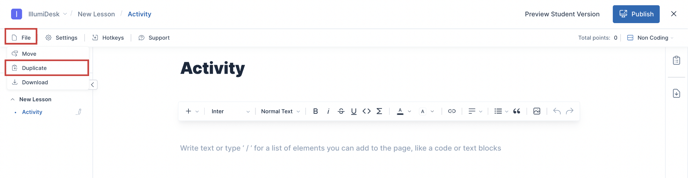
- Select Duplicate from the dropdown menu.
- A dropdown menu appears with the courses that have been created in your Campus.
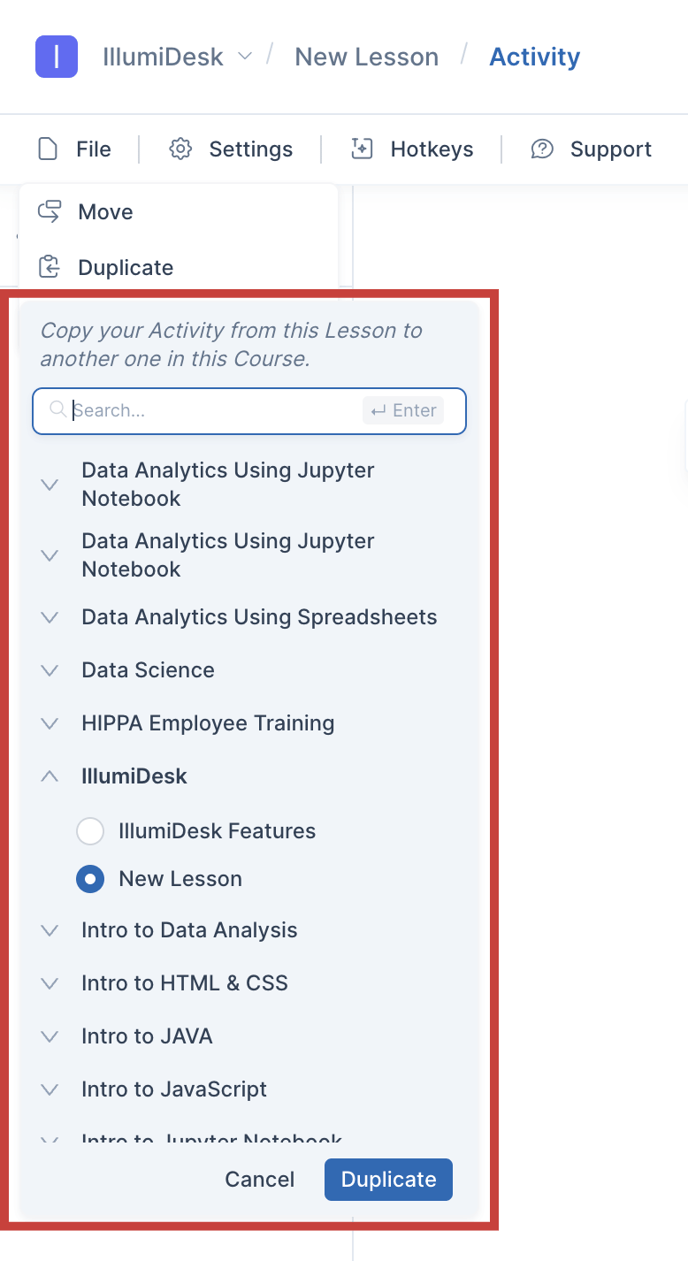
- Select which course and lesson you wish to duplicate the Activity too and select "Duplicate".
- A message is displayed saying "Activity duplicated successfully to Your New Activity", click on the message to navigate to your new activity or open the course list page to see your duplicated activity.
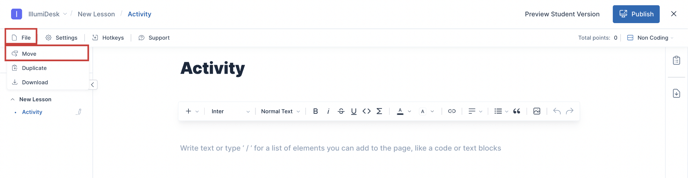
How to Move Activity?
- Open an activity (both published or not published) in the activity editor.
- Click on the "Move" option in the header.
- Move dropdown is opened.
- Search field is empty.
- Lessons list from current course is displayed.
- Current lesson is checked.
- Move button is disabled.
- Select any lesson except the current > Move button is enabled
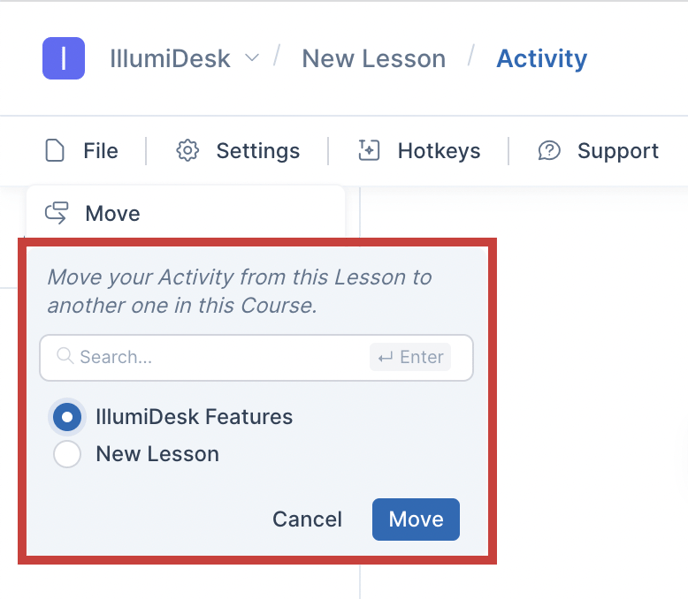
- Click on the "Move" button.
- Activity is moved to selected lesson.
- Activity status is not changed.
- Lesson name is changed in breadcrumbs.
- Toast message "Activity moved successfully to <lesson_title>" is displayed.