
A step-by-step guide to uploading, adding, removing, and downloading files in the Activity Editor
How to Add and Manage Attachments in the Activity Editor
1. From the Activity Editor, click the "Attachments" icon

2. Click "Add Attachment"

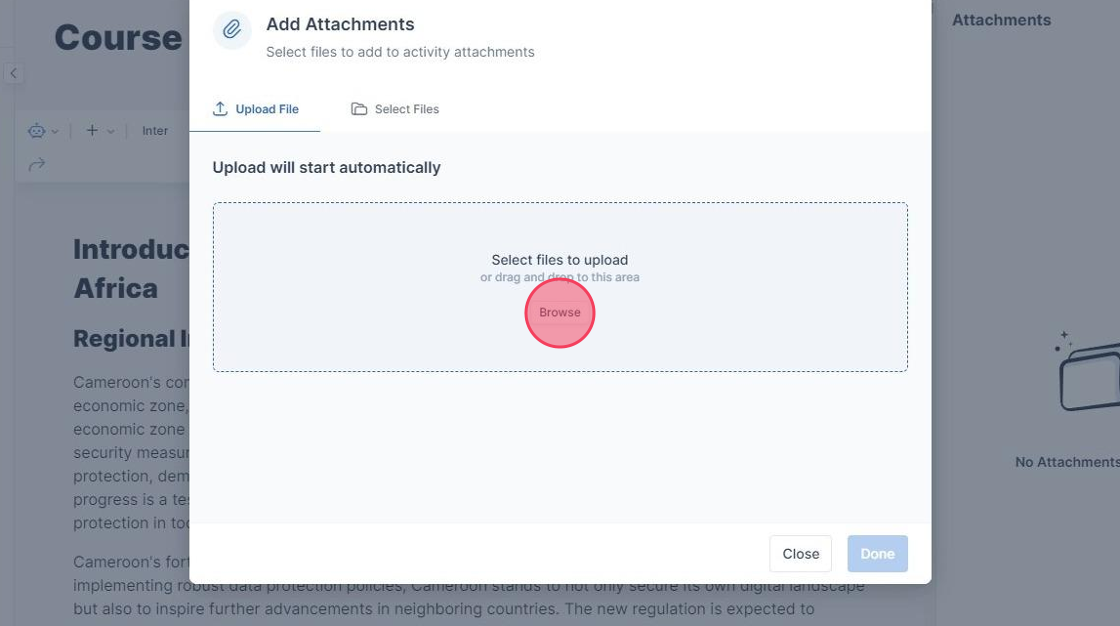
3. Upload Files
- Click "Browse" to upload from your local files
- The local file you uploaded will display below

- Click "Done"

- The toast message, "Your attachments have been uploaded Successfully" will display, and you can see your uploaded attachment in the sidebar

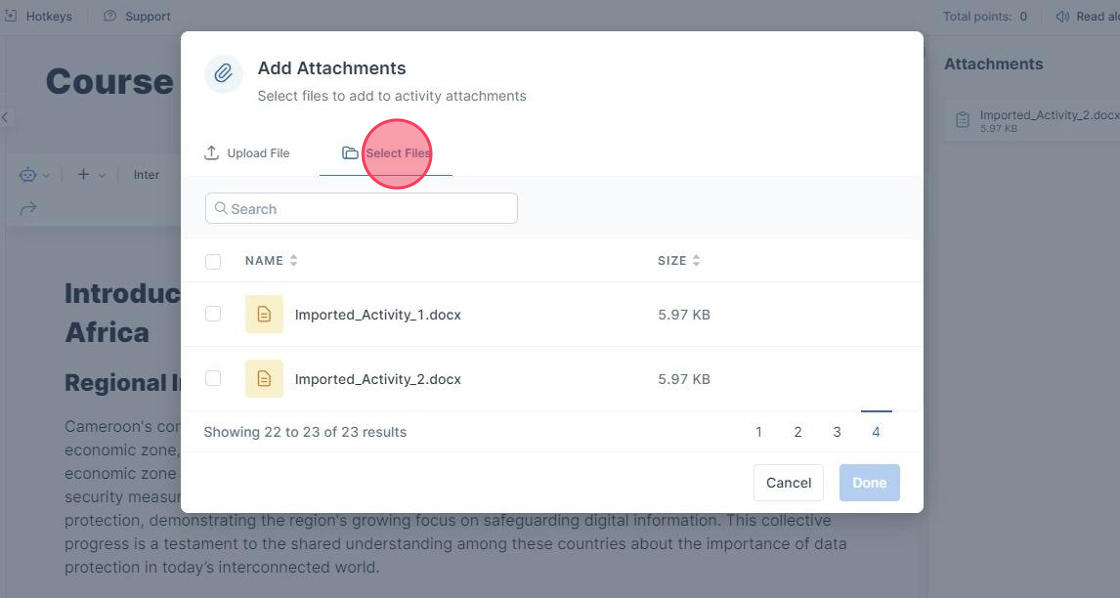
4. Add previously uploaded files as attachments
- Click "Select Files" to browse previously uploaded files
- Click the checkbox next to the file(s) you want to attach to the activity
- Click the checkbox next to "Name" to select all files
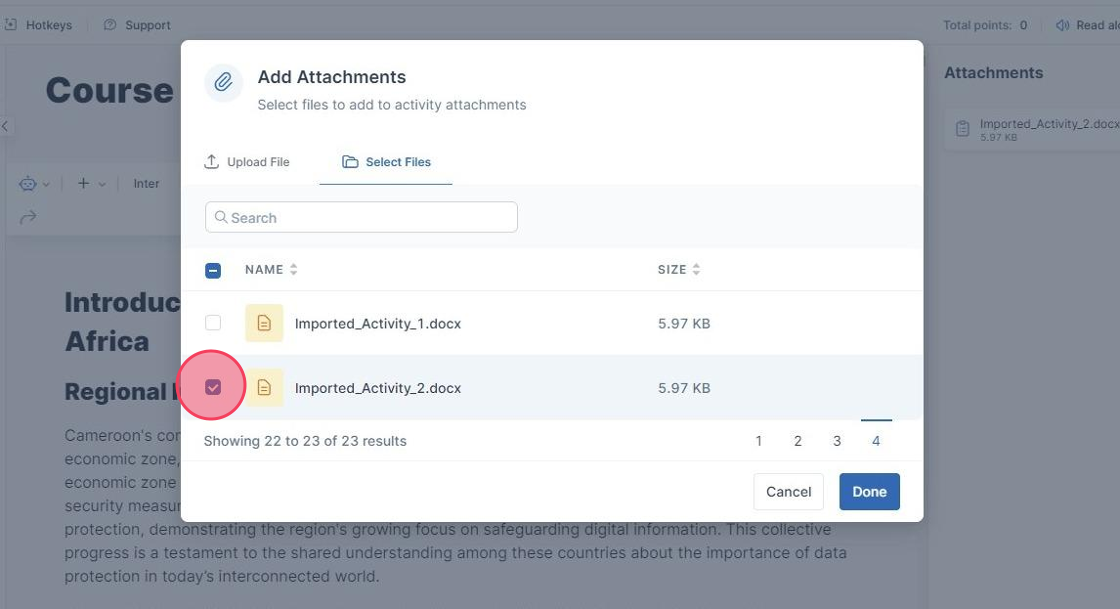
- Click "Done"

5. Manage your attachments in the Activity Editor
- From the sidebar, click the attachment you want to manage

- Select "Remove" to delete the attachment from the activity
- Select "Download" to save the attachment to your device
