
This article shows you how to access the campus file manager create folders for files, upload files, and manage the files you have within your campus.
Access Campus File Manager
- Log in to your campus
- Click the "Files" button on the left panel of the campus homepage
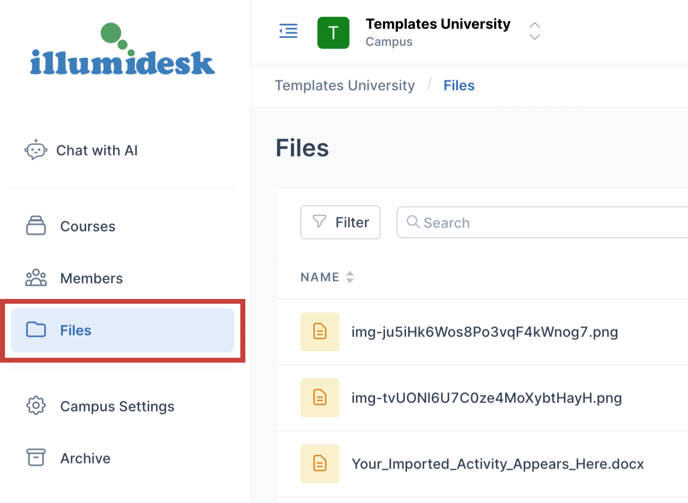
- Your campus files are displayed here
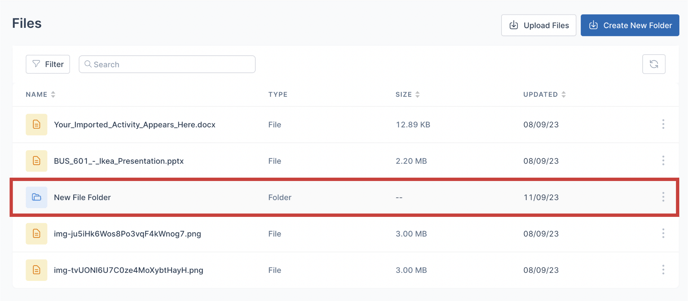
Create File Folders
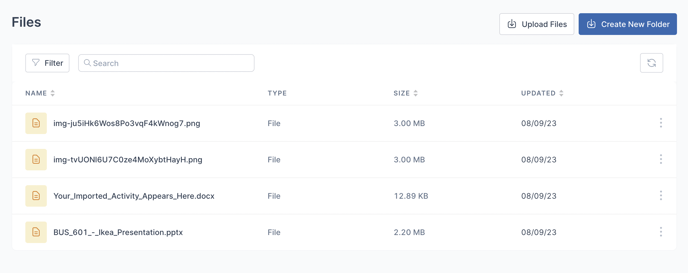
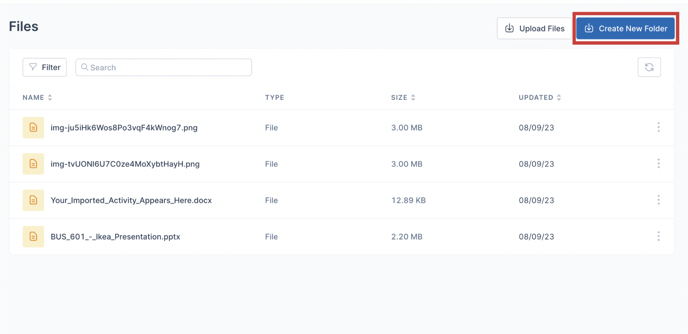
- Navigate to the campus "Files" page.
- Click "Create New Folder"
- The "Create Folder" modal is displayed
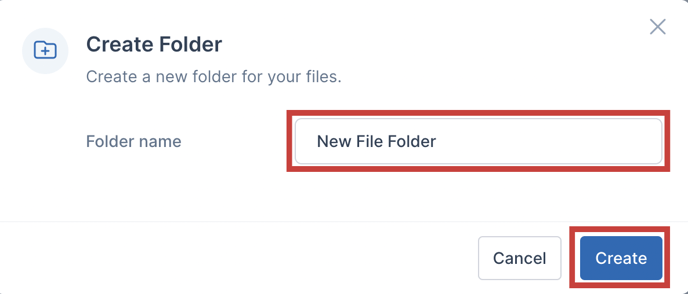
- Add a Folder Name and click "Create" to add the new folder
- The new folder is displayed on the "Files" page
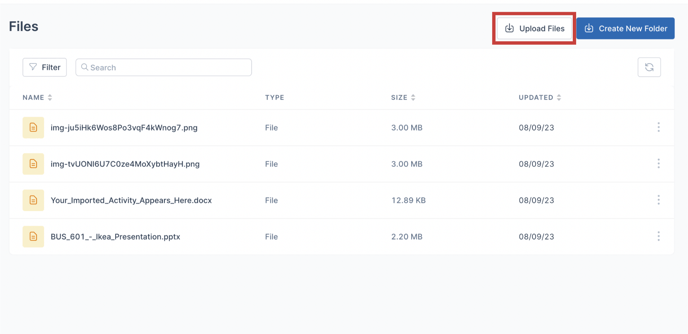
Upload Files to Campus
- Navigate to the campus "Files" page
- Click the "Upload Files" button at the top right of the files page
- The "Upload Files" modal is displayed
- Click the "Browse" button to open your local file manager
- Select the file you want to upload

- The file is uploaded with "Success" highlighted in green to indicate a successful upload
- Click "Done" to upload selected files to Campus File Manager
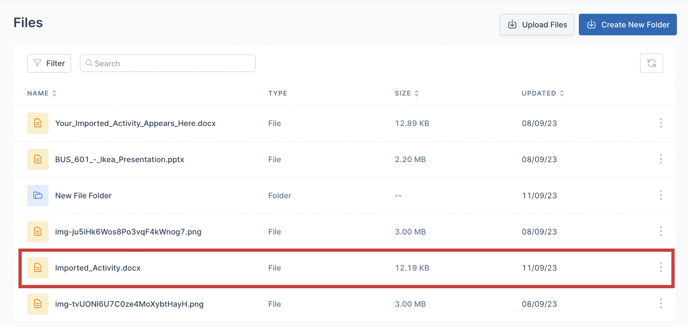
- Your file is now displayed in the Campus File Manager
Rename Your File
- Navigate to the campus "Files" page.
- Click on the 3 dot menu next to the file you want to rename to display the dropdown
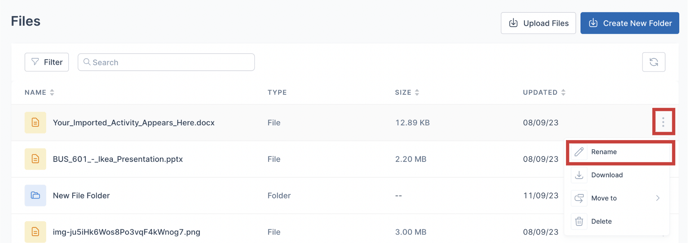
- Click "Rename"
- The "Rename File" modal is displayed
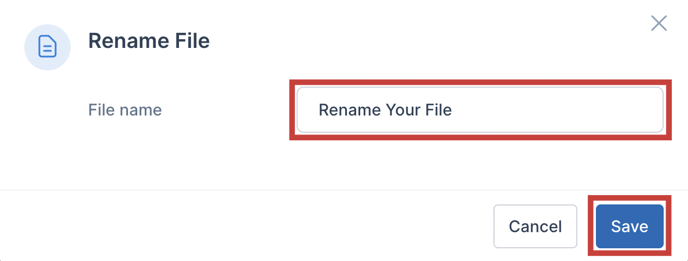
- Type in the new name for your file and click save
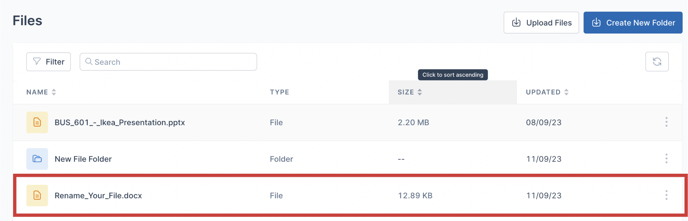
- The file is displayed in the "Files" page with the new name
Download Your File
- Navigate to the campus "Files" page.
- Click on the 3 dot menu next to the file you want to download to display the dropdown
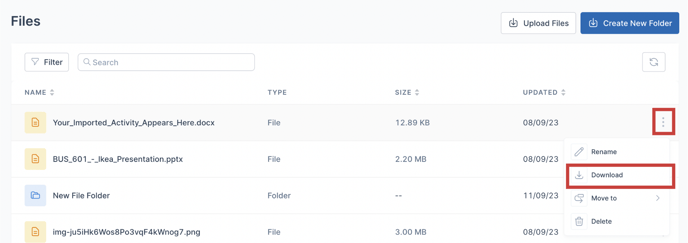
- Click "Download"
- The file is downloaded to your local device
Move a File
- Navigate to the campus "Files" page.
- Click on the 3 dot menu next to the file you want to move to display the dropdown
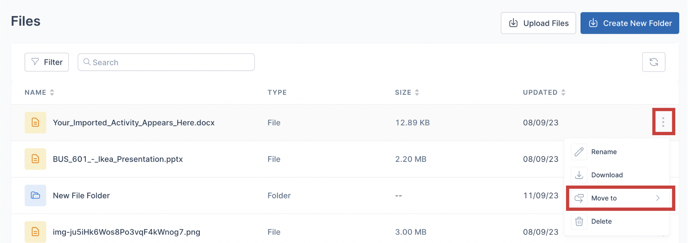
- Click "Move to" to open the folder selection menu
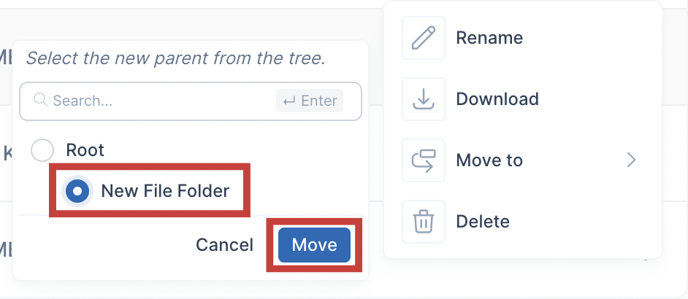
- Select the folder you want to move the file to and click "Move"
- The file is moved to the selected file folder
Delete a File
- Navigate to the campus "Files" page.
- Click on the 3 dot menu next to the file you want to delete to display the dropdown
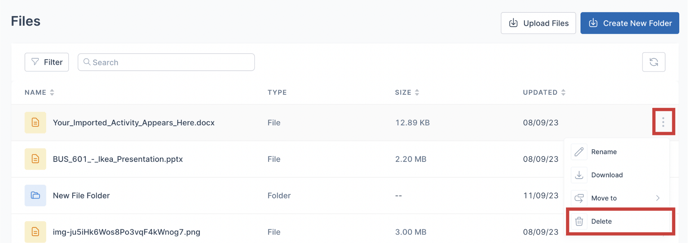
- Click "Delete"
- The "Delete File?" modal is displayed to be sure you want to delete the file
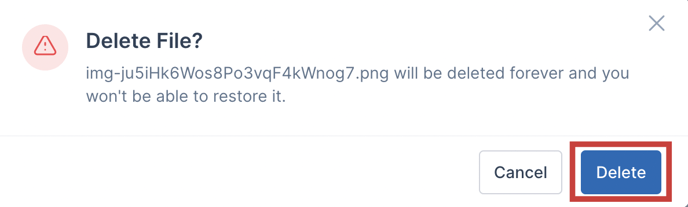
- Select "Delete" to delete the file