
In this guide, you will learn how to create a course using AI and how to customize it to suit your needs.
How to Create a Course with AI?
1. From your Campus Homepage, click "+Create Course"

2. Click "Generate with AI"

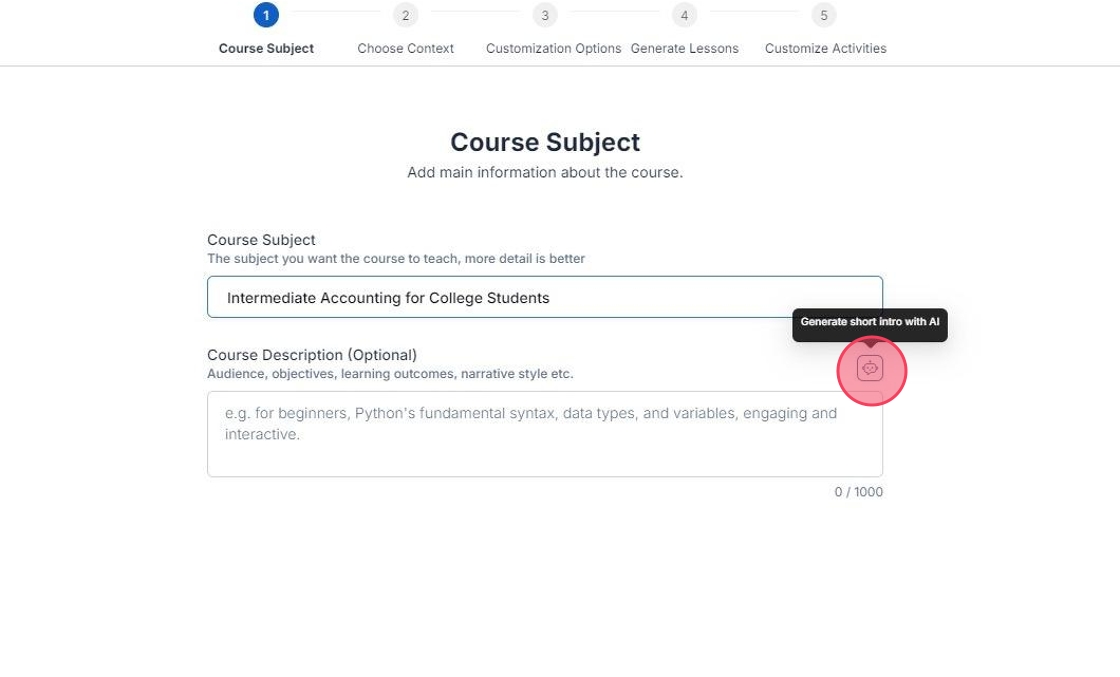
3. Type a "Course Subject" in the text box (more detail is better)
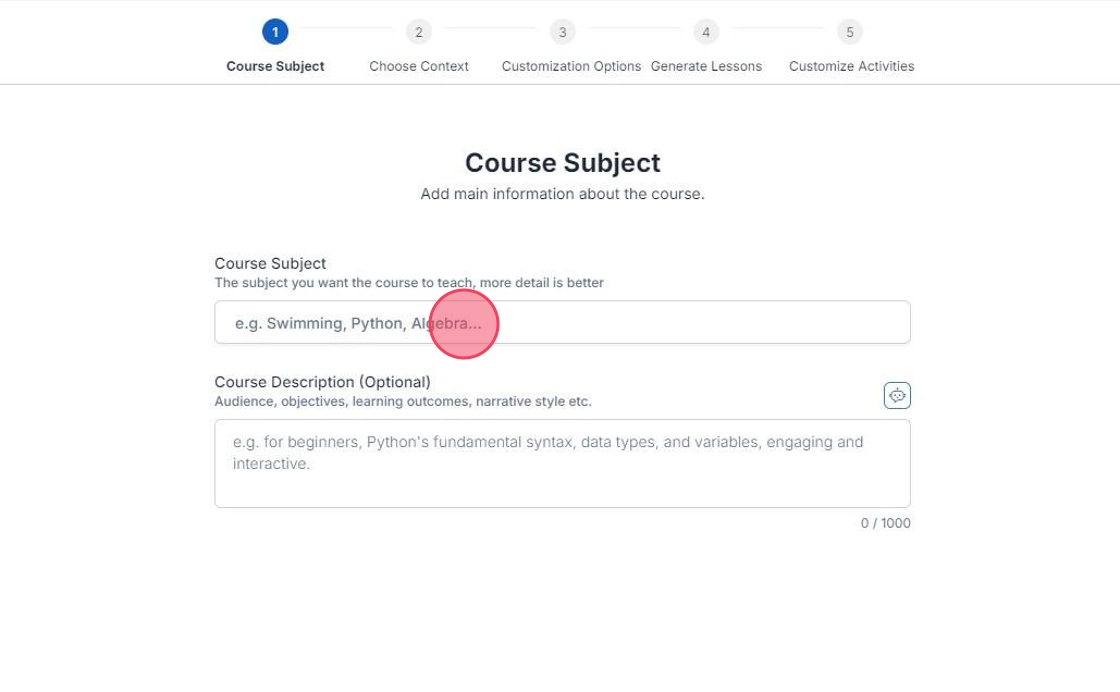
4. Click the robot icon to generate a "Course Description" (optional)
5. Click "Next"

6. Click the "Add Context" dropdown arrow, and select your previously uploaded context (optional)

7. Click "Next"

8. Click "Course Language" and select from the options

9. Click "Tone of Voice" and select from the options

10. Click "Content Depth" and select from the options

11. Click "Target Audience" and select from the options

12. Click "Next"

13. Increase/decrease "Number of Lessons" with the dropdown menu

14. Click "Generate Lessons" for AI to create lesson names, or input your own by typing in the text box

15. Increase the amount of lessons with the "+Add Lesson" button

16. Click "Next"

17. Customize all lessons at once with the "Global Lessons Settings" dropdown menu

18. Select/deselect the elements you wish to include/exclude from your activities
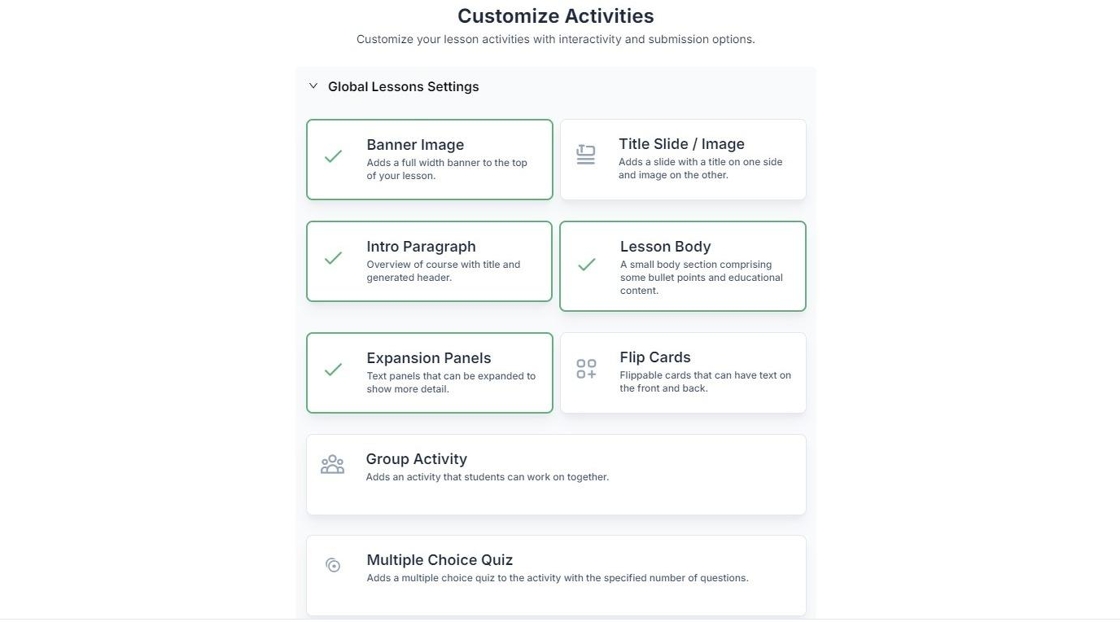
19. To customize a lesson individually, simply select its dropdown menu and select/deselect the elements you wish to include/exclude

20. If you selected "Group Activity", input basic instructions in the text box (optional)

21. If you selected "Multiple Choice Quiz", modify the Number of Quiz Questions with the "+/-" buttons

22. Click "Generate Course"

23. Click "Close"

24. You will receive the toast message, "Your course has been generated successfully"
- Click "Review" to be immediately redirected to the course

25. Your course will now be available in your Campus Homepage. Click to launch the course
