The purpose of this article is to provide detail about how to set up LTI Integration with Canvas
Overview
The Canvas LMS requires the installation of a Developer Key. This Developer Key creates an identifier known as a Client ID. The combination of the client id and the tool's public key is used to establish a trusted relationship between the tool and the consumer (in this case IllumiDesk and the Canvas LMS, respectively).
These steps are usually completed by the LMS's administrator.
NOTE: The following guide will go back and forth between steps to complete in Canvas LMS and the IllumiDesk application.
Campus Linking
In The IllumiDesk Application
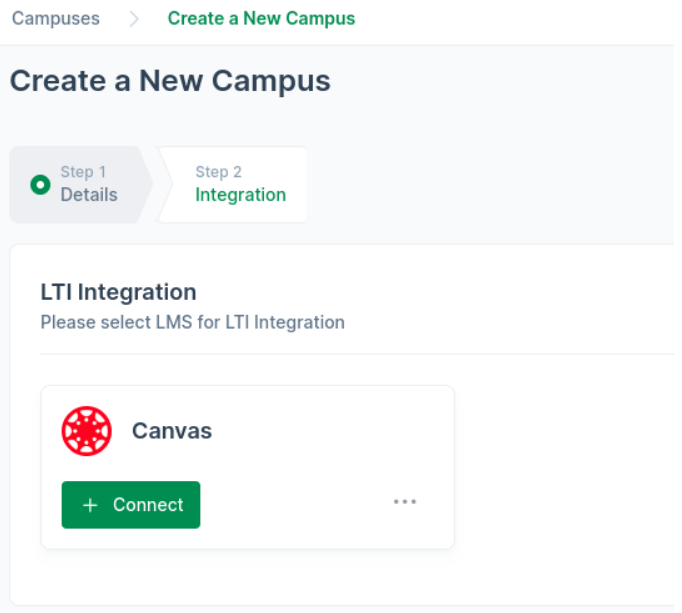
When creating a Campus, there is an optional second step to add LTI integrations. At the time of writing this document, the Integration step will list the Canvas LMS Integration. To link a campus with Canvas, a Canvas client_id is required. The next section provides information on how to generate a client id in your Canvas LMS.

Create the Developer Key with URL Configuration Option In Canvas LMS
The URL Configuration option is a JSON file that contains the application's configuration settings as well as the JSON Web Key (JWK). The JWK is a public key that is used to verify signed requests from the tool.
Please refrain from using the Manual option to create a new Developer Key. The IllumiDesk tool requires a launch into a new window for the best user experience. There have also been reports of SameSite cookie errors with the latest browser versions. Follow these steps in your Canvas LMS.
-
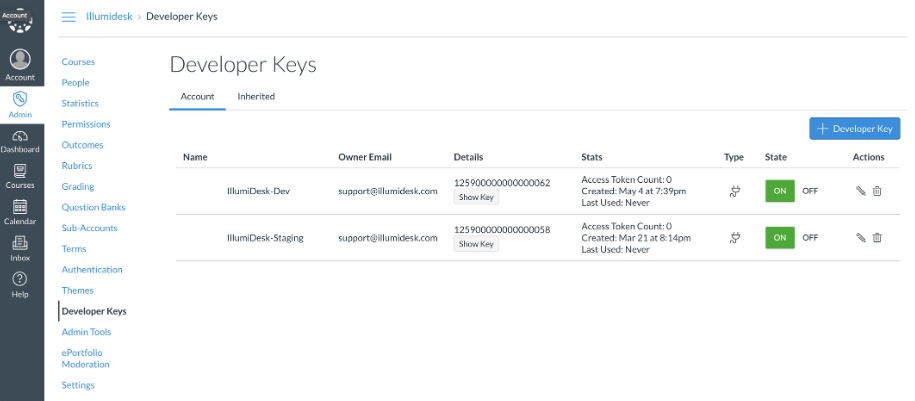
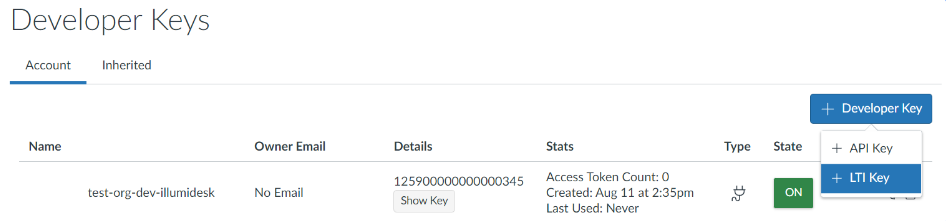
Navigate to Admin -> Developer Keys

-
Click on the + Developer Key button and select the + LTI Key

3. Provide the following information in the LTI Key Form:
|
Text Field |
Value |
Required |
|---|---|---|
|
Key Name |
Name of choice. the recommended pattern is organization_name-campus_name-IllumiDesk |
Yes |
|
JSON URL |
https://api.illumidesk.com/api/v1/lti/config/canvas/ |
Yes |
|
Redirect URI |
https://api.illumidesk.com/api/v1/lti/launch/ |
Yes |
|
Owner Email |
usually email of LMS admin |
No |
|
Notes |
describe the key |
No |
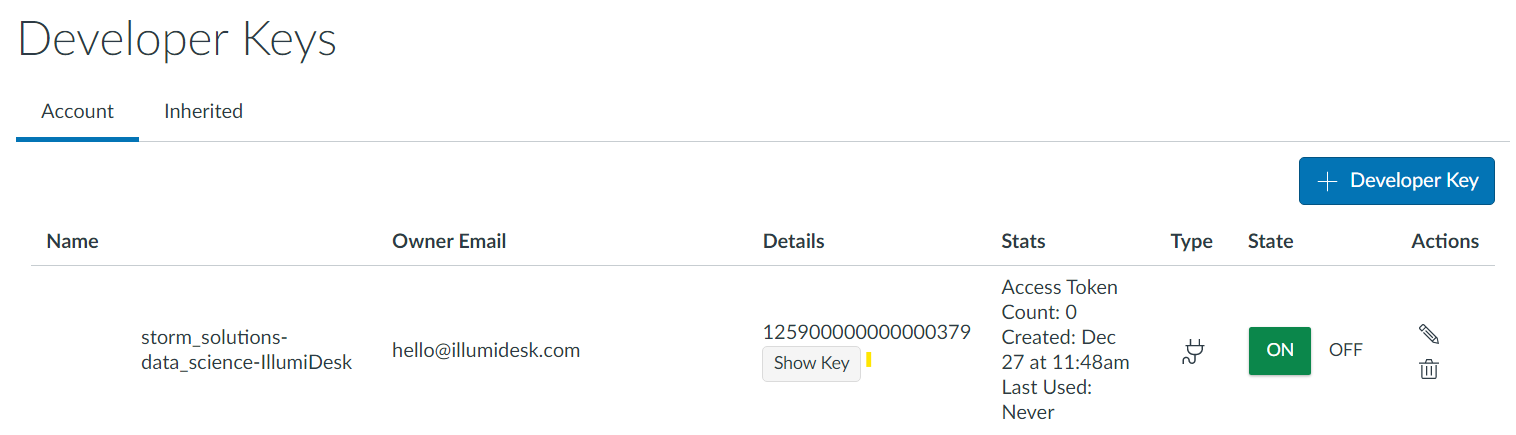
4. Activate Developer Key by updating the State from OFF to ON and then copy the value from the Details column. This value is the Client Id

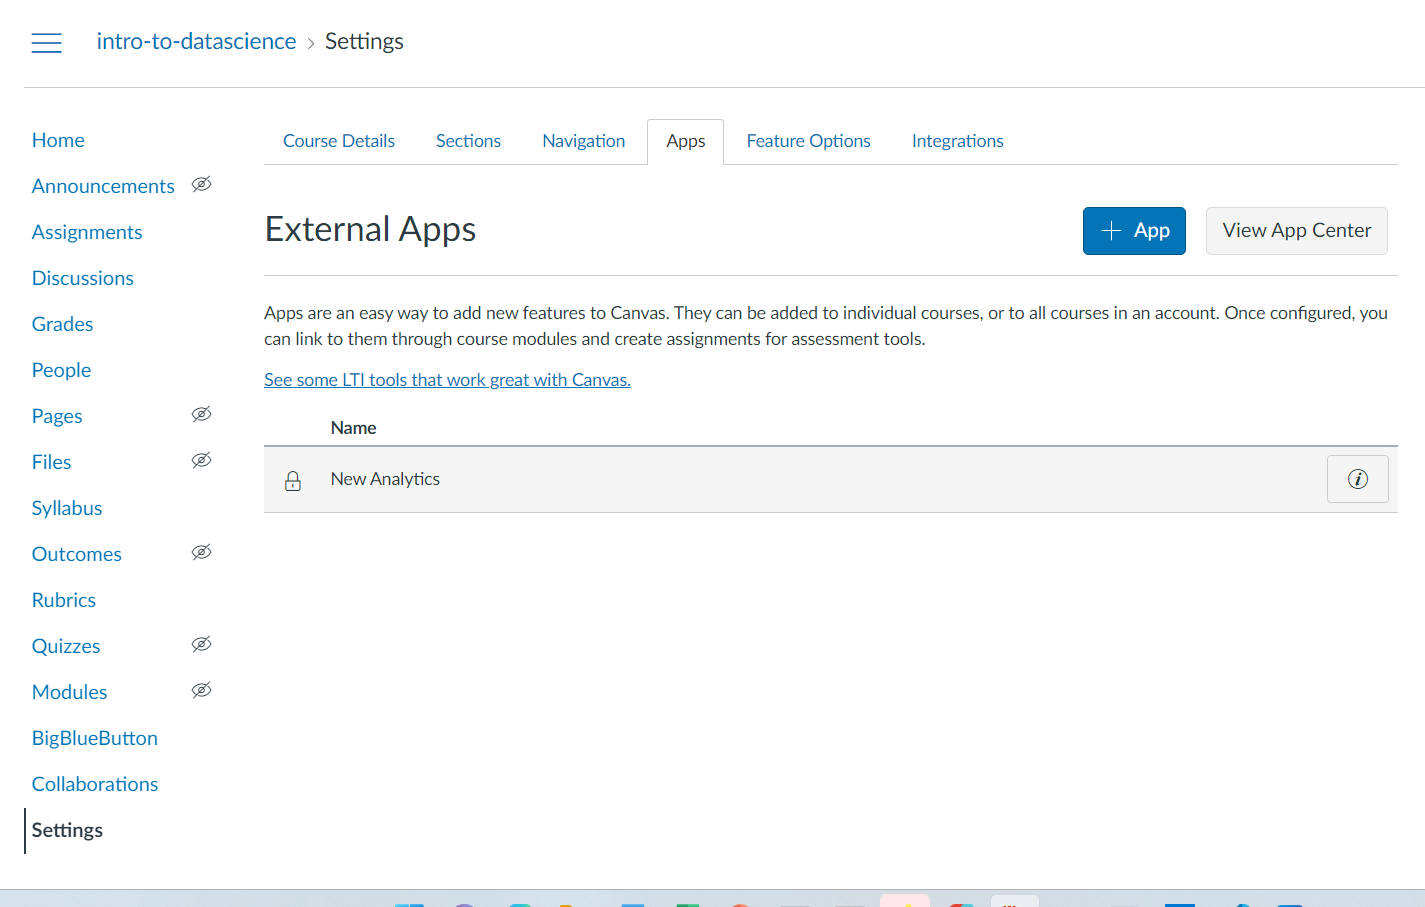
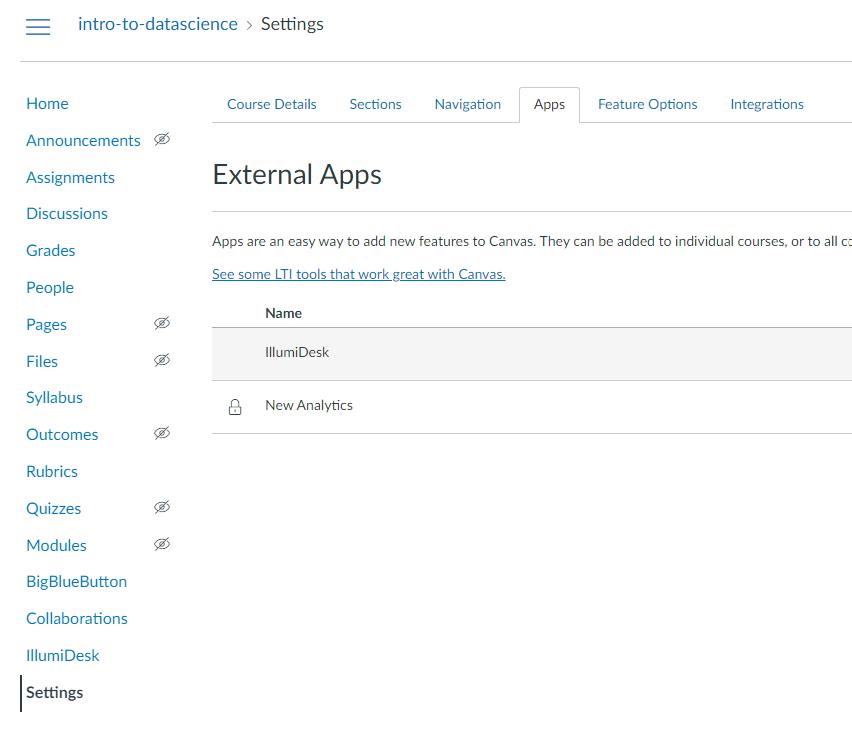
5. Navigate to your course on Courses->Settings->Apps->+App

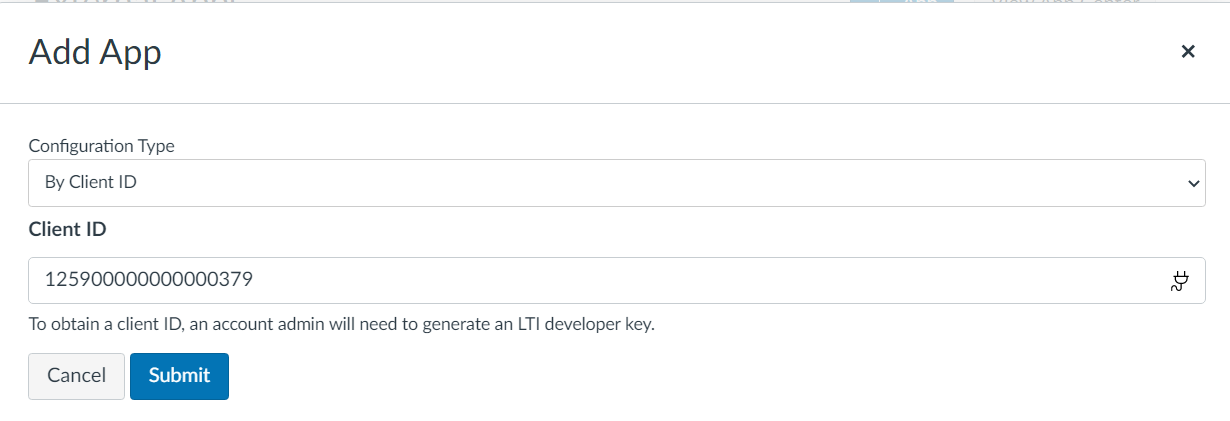
6. Select By Client ID as the configuration type, paste the Client ID, and click Submit.

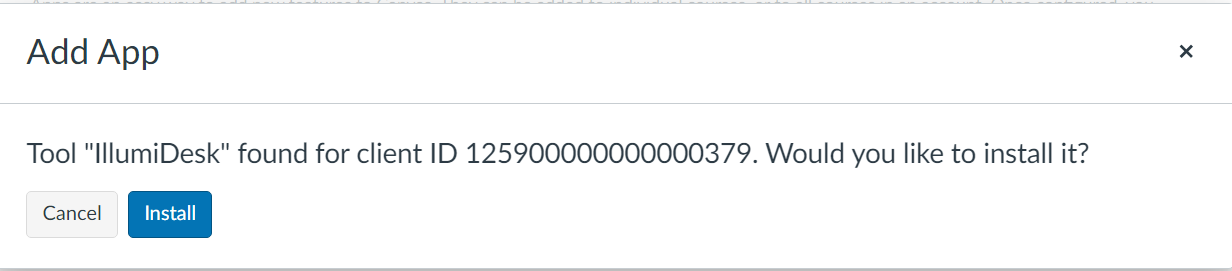
7. When prompted to install IllumiDesk Tool, click Install

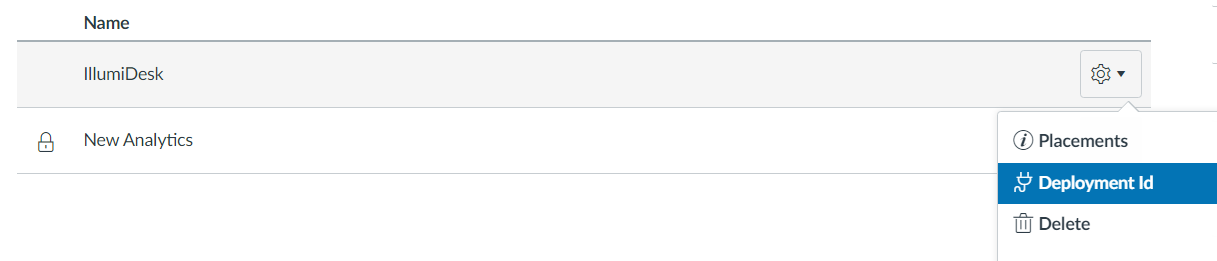
8. You should now see IllumiDesk listed under Courses->Settings->Apps->View App Configurations. Select the Gear drop-down->Deployment Id

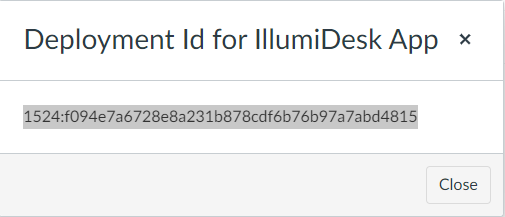
9. Copy the Deployment ID for IllumiDesk App to your clipboard

Link Campus in IllumiDesk App with Canvas LMS
Follow these steps, in the IllumiDesk Application
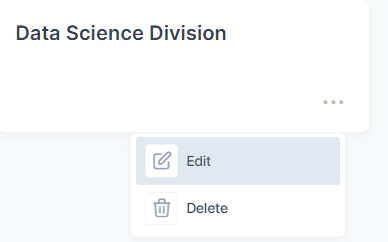
1. In the Illumidesk application, right-click campus->Edit. Alternatively, you can navigate to your campus->Campus Settings

2. Go to the Integration LTI tab and select +Connect under your LMS option

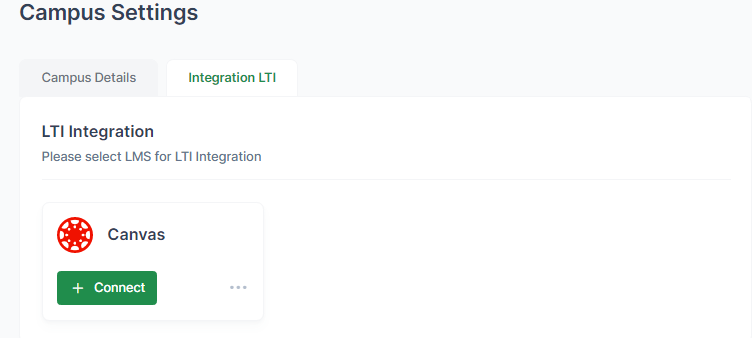
3. Paste the Client ID and select Connect.

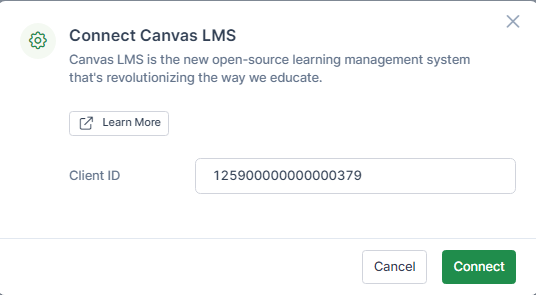
The campus is now integrated with Canvas
Course Linking
Course Linking will allow you to launch an IllumiDesk application course from a Canvas LMS course. It is required that the course is listed in a Canvas integrated Campus.
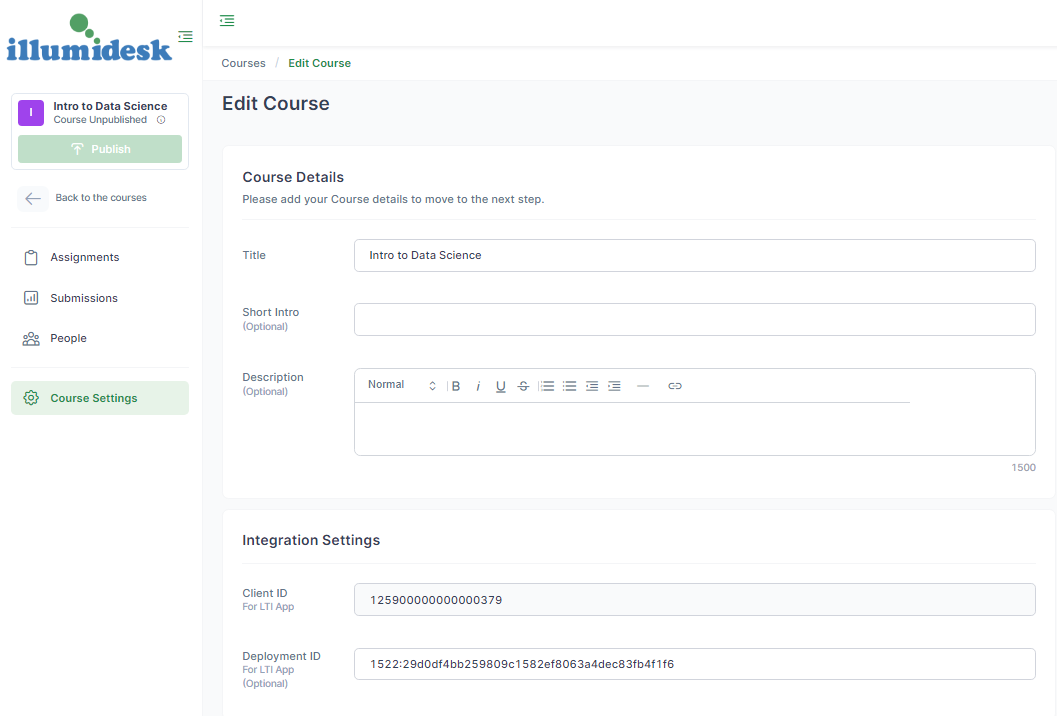
1. In order to link the course, navigate to the course->course-settings in the IllumiDesk application and paste the Deployment ID copied in Step 9 of the Campus Linking section, Create the Developer Key with URL Configuration Option In Canvas LMS.
Assignment Linking
The final step is to link Assignments in your Canvas Integrated Course. The following section assumes you have linked Canvas at both the Course level and Campus level. This section also assumes that assignments have already been created in your Canvas Integrated Course. If you need to create assignments, use the Assignments and Assignment Editor section to guide you through that process.
Follow these steps in the Canvas LMS
-
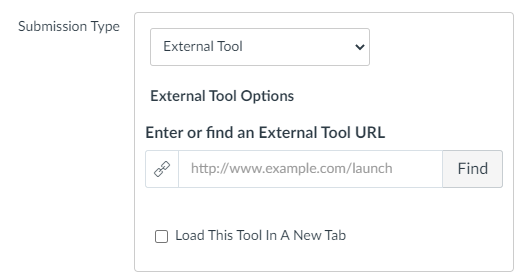
Navigate to your Course in Canvas LMS-> Assignments and click the +Assignment button


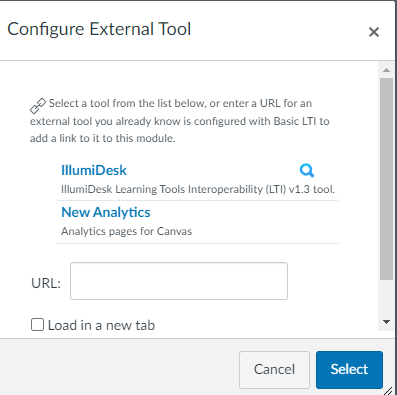
4. After clicking the Magnifying glass button, the Link Resource from External Tool modal will pop up which will list the assignments listed under the linked Course in the IllumiDesk Application

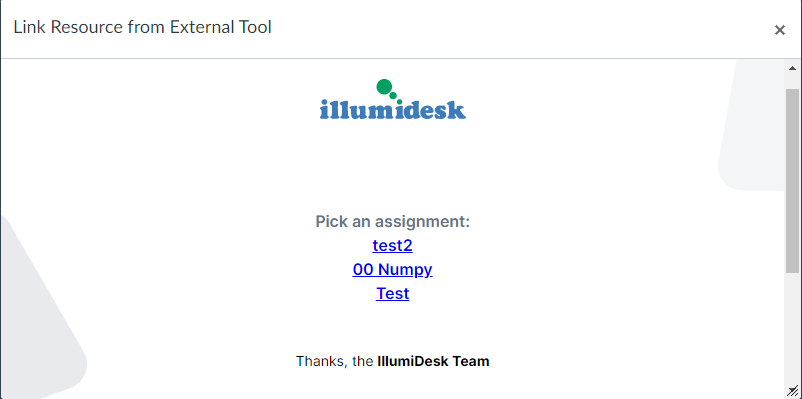
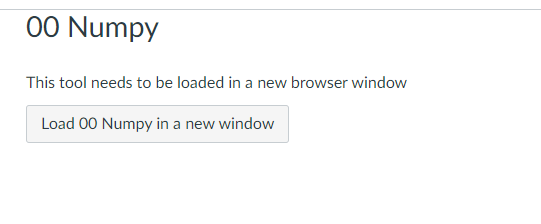
5. Select the appropriate assignment and select Load assignment in a new window button
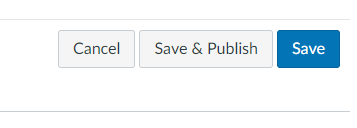

8. Select the assignment and Click the Load Assignment in a new window button